Welcome to

MechMinds Wiki Page

Get info

Read More About Our Project

You are allowed 100% to download and use our code and strategies. You are not allowed to redistribute this content on any other website without a permission from us.

Welcome to MechMinds' comprehensive guide on creating a line following robot! In this wiki page, we'll walk you through the step-by-step process of building your very own line following robot, a fundamental project in the realm of robotics.

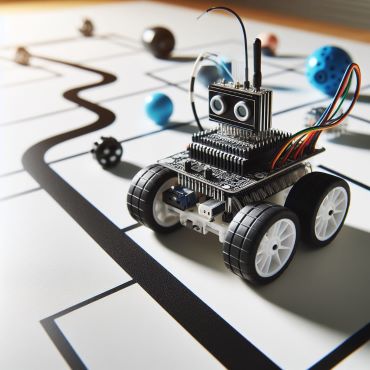
Introduction to Line Following Robots:

A line following robot is an autonomous robot that can detect and follow a line or path marked on the ground. These robots are commonly used in various applications such as industrial automation, warehouse management, and educational projects. Building a line following robot not only enhances your understanding of robotics principles but also provides hands-on experience in programming and hardware integration.

Approach

Guide Steps

  • Step 1: Gathering Materials

    Before diving into the construction process, gather all the necessary materials and components.
    These typically include:

    Chassis
    Motors and wheels
    Line following sensor module (e.g., infrared sensors)
    Microcontroller board (e.g., Arduino Uno)
    Motor driver module
    Power source (e.g., batteries)
    Jumper wires
    Screwdrivers, pliers, and other tools

  • Assembling the Hardware

    Once you have all the components ready, begin assembling the hardware of your line following robot.

    Attach the motors to the chassis and mount the wheels securely. Install the line following sensor module on the front of the robot to detect the line. Connect the motors to the motor driver module and wire them to the microcontroller. Connect the line following sensor module to the microcontroller.
  • Programming the Microcontroller

    Next, program the microcontroller to control the robot's movements based on sensor input. You can use the Arduino IDE or any other suitable programming environment.

    Here are the basic steps:

    Define the pins used for motor control and sensor input. Write code to read sensor data and determine the robot's movement direction based on the line detected. Implement control algorithms such as proportional-integral-derivative (PID) control for smooth navigation. Test the code thoroughly to ensure proper functionality.

  • Testing and Calibration:

    After programming the microcontroller, it's time to test the line following robot. Place it on a track with a contrasting line and observe its performance. Make any necessary adjustments to the code or hardware to improve accuracy and stability. Calibration may involve tweaking sensor thresholds, motor speeds, or PID parameters.

    Calibration may involve tweaking sensor thresholds, motor speeds, or PID parameters. Fine-tune these settings to ensure the robot follows the line smoothly and consistently under various conditions. Conduct multiple test runs and record the robot's behavior to validate its performance.

    Facebook Twitter Linkedin
  • Fine-Tuning and Optimization

    Continue fine-tuning your line following robot to achieve optimal performance. Experiment with different control strategies, sensor configurations, and hardware setups to enhance speed, precision, and reliability. Document your findings and adjustments for future reference.

    Additionally, consider environmental factors such as lighting conditions, surface textures, and line variations. Adjust your robot's parameters accordingly to ensure robust performance across various operating conditions. Collaborate with peers and experts in the field to exchange ideas and gather insights for further improvements.

    Facebook Twitter Linkedin
"Creating a line-following robot is a fascinating project that combines engineering, programming, and creativity. By assembling hardware components such as motors, sensors, and microcontrollers, and programming them to follow a designated path, you can build a robot capable of autonomous navigation. This project offers an excellent opportunity to learn about robotics principles, programming languages, and hardware integration. With careful planning, testing, and iteration, you can refine your robot's performance and explore various applications in automation, education, and beyond."


OUR WORKSPACE

Embark on the Journey with Robotics

With pride, we announce the completion of another successful project here at EduWell. Our team's dedication and hard work have brought us closer to achieving our goals, and we are thrilled to share our accomplishments with you. .

In our dynamic office environment, innovation thrives. From brainstorming sessions to implementation phases, every step is infused with creativity and collaboration. Our workspace reflects our ethos of excellence, where trust, integrity, and passion drive us forward. .

As we celebrate our achievements, we invite you to join us in exploring the possibilities that lie ahead. Let's connect and discuss how we can continue to make a positive impact together. .

    Experience the excitement of our journey.

    Indulge in the creativity of our workspace.

    Engage with our vibrant community.

    Embrace the spirit of innovation and progress.